
Gentleman,
the front hood symbol that has the two circles plus the bottom which says "pinzgauer" that I have seen have all been painted green. I've seen some of them which have not and are silver/colored. Where can I get the orginal ?
Pinz symbol
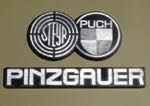

SAV carries both. 7111711002/96 is the Pinzgauer name plate. It looks green on their website but is actually unpainted metal. 7001711502/55 is the Steyr plate. They have both available used also but would probably be painted green. They are not difficult to strip the paint off however.
You'll need someone with small hands to mount them. The studs are in a really tight spot.
Paul
You'll need someone with small hands to mount them. The studs are in a really tight spot.
Paul
Paul C.
_________
'73 Swiss 710M SOLD
'89 Puch 230GE
_________
'73 Swiss 710M SOLD
'89 Puch 230GE
pinz emblem
Mine was green too.
I eventually got a cheap pot at a thrifty store for $.99 and added some TSP to the water and boiled the paint off. (The emblem is aluminum and will not tolerate much abuse.)
I sprayed the emblem black and used light grade sand paper on a flat surface to sand the standing surface clean. Now it looks very much like the original, minus a few colors.
Removal and installation is a bit of an issue as the nuts are very small and waaay up in the front.
Do not try to use one of your wife's good kitchen pots to boil the paint off.
Morris
-
pinzwheeling
- Posts: 537
- Joined: Thu Sep 07, 2006 7:14 pm
- Location: San Diego / Ramona
- Contact:
Even easier is to just lightly sand the surface of the emblem while still installed on the truck. Eventually you'll get to bare metal on the raised surfaces which can then be polished with fine steel wool. Mask off the area around the emblem and clear coat the entire thing.
It won't look as super clean as Morris' idea, but the ease of doing it makes up for it.
It won't look as super clean as Morris' idea, but the ease of doing it makes up for it.
Re: Pinz symbol
I want to remove the green from my front emblems. Any one have tricks different from Morris’ TSP in boiling water?
Thanks
Thanks
_________________
Southwest Pinzgauer Association Member
1977 Austrian 712K
http://www.swpinz.com
Facebook: Southwest Pinzgauer
Southwest Pinzgauer Association Member
1977 Austrian 712K
http://www.swpinz.com
Facebook: Southwest Pinzgauer
Re: Pinz symbol
No one is coming. It’s up to us.
Re: Pinz symbol
My turn to strip and refinish the Symbols.
No luck with TSP, all I could find locally was TSP powder, mixed that
over 10X the recommend dosage and no luck, even put the symbols
in that broth over the coleman -- just would not cut into that tough
paint. Went back to Home Depot and bought some JASCO Paint and
epoxy remover -- that worked, but took 3 treatments. There was at
least 3 or more layers on these Aluminum castings.
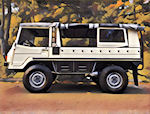
After repaint and polishing off the surface paint, I did a Clear coat
to protect from Oxidation.
If your overlay observant --yes! The window frame is not re-painted
yet and the "Blue" stuff you see at the window seam is Eastwood
self-leveling Epoxy sealer -- works great.
No luck with TSP, all I could find locally was TSP powder, mixed that
over 10X the recommend dosage and no luck, even put the symbols
in that broth over the coleman -- just would not cut into that tough
paint. Went back to Home Depot and bought some JASCO Paint and
epoxy remover -- that worked, but took 3 treatments. There was at
least 3 or more layers on these Aluminum castings.
After repaint and polishing off the surface paint, I did a Clear coat
to protect from Oxidation.
If your overlay observant --yes! The window frame is not re-painted
yet and the "Blue" stuff you see at the window seam is Eastwood
self-leveling Epoxy sealer -- works great.
- PinzSymbols.jpg (752.98 KiB) Viewed 8289 times
Puller: 71' 710K 2.7L EFI aka Mozo
Follower: Sankey MK 3, 3/4 Tonne
Rescue Pinz: 73' 712MK
Driver: Ron // KO0Q
Follower: Sankey MK 3, 3/4 Tonne
Rescue Pinz: 73' 712MK
Driver: Ron // KO0Q
-
TechMOGogy

- Posts: 2831
- Joined: Wed Feb 01, 2012 11:39 am
- Location: Ontario, Canada
Re: Pinz symbol
I can tell ya, don't use Nitrile gloves when using the JASCO stripper -- eat right through them
with my hands still in the glove
Ended up using tongs to pick the parts up and move them to wash and rinse...
with my hands still in the glove
Ended up using tongs to pick the parts up and move them to wash and rinse...
Puller: 71' 710K 2.7L EFI aka Mozo
Follower: Sankey MK 3, 3/4 Tonne
Rescue Pinz: 73' 712MK
Driver: Ron // KO0Q
Follower: Sankey MK 3, 3/4 Tonne
Rescue Pinz: 73' 712MK
Driver: Ron // KO0Q
Re: Pinz symbol
I had mine sandblasted. Quick and easy and most paint/powdercoat places will do it. I did the same thing and painted a few coats of black. Then using a hand sander, I sanded the flats, then clearcoat. My problem was that with the slightest bit of too much torque on the bolts, one of the bolts/fasteners broke. I just drilled a hole through the entire thing and fastened it with black painted screws. It turned out awesome!
Re: Pinz symbol
Here's a pic of the refinish on mine. Since my vehicle has a well-worn finish, I went the same way on the symbol.
- IMG_0576.jpg (1.03 MiB) Viewed 8119 times
No one is coming. It’s up to us.
-
TechMOGogy
- Posts: 2831
- Joined: Wed Feb 01, 2012 11:39 am
- Location: Ontario, Canada
Re: Pinz symbol
The finishing technique is called "dry brushing". You'll need masking tape, an Exacto knife, a piece of cardboard, flat black paint, flat white paint, flat clear paint, paper towels and a very stiff bristled hobby paint brush.
The first step is pretty obvious. I cleaned it really good.
Second I masked it off. Just the emblem as a whole not the lettering.
Third. I spray painted the entire emblem flat black. I think I used Krylon. Two coats.
Four. The important part. Spray a puddle of flat white on a piece of cardboard. Dip the brush into the white paint wipe it thoroughly on the clean paper towel until you can't see any paint coming off at all. Then very gently brush the emblem until you start seeing the white paint building up on the edges. I advise doing this from all directions to get an even appearance. Then just keep doing it until you get it to the level of coverage that you want.
No one is coming. It’s up to us.