Intro from Malaysia - WR7002 - C304

Volvo TGB and 30X (303/304/306) mods and resto work, news, resources and non-technical stuff
geckoadventure
New Zealand
Posts: 481
Joined: Sat Aug 21, 2010 8:48 pm
Location: Malaysia
Contact:

Re: Intro from Malaysia - WR7002 - C304

Post by geckoadventure »

16 July 2016

Quiet drive up to IPOH

First fix the intercooler as only 3 bolts fit easily the 4th needs pressure to make it fit. I spend all day running up and down fitting and drilling the intercooler holes and lowly make headway.
Image

Start working on making a bracket for the Air Compressor
Image

Image

Then it was hometime again as the 6.30pm lockup time arrived.

Then monday night going to dinner we collect this little treasure off the road a little injured and a little sick. It's name is now Rocket.
Image

I collect the doors from the panel shop they are really well done. Very little body filler will be needed.
Image

Image
Last edited by geckoadventure on Wed Aug 17, 2016 7:16 pm, edited 1 time in total.
geckoadventure
New Zealand
Posts: 481
Joined: Sat Aug 21, 2010 8:48 pm
Location: Malaysia
Contact:

Re: Intro from Malaysia - WR7002 - C304

Post by geckoadventure »

27 July 2016

Collect enough steel to fix the door pin tube I had to cut ready for the weekend.
and the ARB solenoids to remove air locker hoses from the cabin are collected.

Image

Image
geckoadventure
New Zealand
Posts: 481
Joined: Sat Aug 21, 2010 8:48 pm
Location: Malaysia
Contact:

Re: Intro from Malaysia - WR7002 - C304

Post by geckoadventure »

29 July 2016

Take a day out of the office and head to IPOH on the Friday morning.

First interruption for the day is the puppy he snatches the rat trap down from the gas bottles with the two rats in it and proceeds to run rampant around the shop floor carrying and barking and pushing the cage. Then I go get undercoat paint and air hose fittin and pucase 3 vaccum hose sets and fittings.
Image

The stainless steel 70mm bends I bought are now being prepared to go from the air filter to the turbo working backwards a lotof cutting and tig welding is required.
Image

Slowly it takes shape.
Image

30 July 2016

I have the taillight brackets they need 2 more bends and they are ready to paint and be mounted permanently.
Image

Brett tig welds in the plugs the ends for me for the door pins so its easier to knock out next time.
Image

The air intake pipe is taking shape
Image

Then I tackle the doors starting to cleanup with the wirewheel and the paint tripper again.
Image

It's going to be a lot of work
Image

31 July 206

Help has arrived so we have 3 working on the Volvo today - Today's todo list.
Image

The air filter's new locaion takes shape
Image

A happy sander knowing the sanding is almost finished
Image

4.45pm the doors look good and sanding with 1000 grit only left
Image

By 6.30pm I have the 2 doors completely painted althouh I only get a pic of 1 pair.
Image

Then we bend up the tailights bracket and its time to get kicked out of the workshop.
Image


it's a long drive home 3.75hours to go 190K a rolled over CO2 truck caused chaos.
geckoadventure
New Zealand
Posts: 481
Joined: Sat Aug 21, 2010 8:48 pm
Location: Malaysia
Contact:

Re: Intro from Malaysia - WR7002 - C304

Post by geckoadventure »

8 August 2016

Saturday was charity day with the kids

Sunday

Took the wife for the 190k drive to IPOH

Only 3 hours on Sunday on the VOlvo arrived 3pm at the workshop and checked the doors etc I undercoated the previous weekend. Finished the tail light brackets off.

Undercoated one of the service hatch doors and a few small issues with a few high spots on the doors.

The count of painted vs unpainted parts is now looking much better.
Image

Image

Still outstanding delivery of speaker panels, overhead console, steering wheel wih race boss. gear lever with new bushes.

6pm time for dinner with mother in law then discovered the puppy had eaten the trailer wiring of the boat trailer I was taking home- oh poop.

and then the long drive home another truck issue caused aus to take over 3 hours to get home again sigh.

Slowly i'm geting there.
geckoadventure
New Zealand
Posts: 481
Joined: Sat Aug 21, 2010 8:48 pm
Location: Malaysia
Contact:

Re: Intro from Malaysia - WR7002 - C304

Post by geckoadventure »

13 August 2016

Saturday one day trip - Sunday I'm in the plane to Kong Kong for 2 weeks

I'm tired long hours I wake up late and step on it the 190K flies past and I arrive outside the workshop 8:57am same time as the owner pulls up.

They are repairing my tire wiring since the puppy chewed it all off.

I see they have finished the radiator inlet piping all nicely tucked away just the radiator outlet to finish.

I have today 2 doors to top coat. The repaired rear panel to strip and undercoat and top coat.

The service panels to apply top coat, The air filter and taillight brackets to paint oh and rubber seal parts to hunt down.

The heat shield will be welded up by the workshop during the week and mounted.
Image

I stripped the rear panel then it was time for the shopping before some of them close 1pm

I received instructions to a rubber shop. Bonus they had the seal for the rear cabin I bought enough for 2 Volvos. The second oh year I bought another Volvo last Saturday after the Kids

charity day lol.
Image

Bolts (and RIVNUTS) collected and more undercoat from the paint shop back to the workshop 2.30pm

By 5pm the rear panel is stripped sanded and undercoated along with the rest of the bare metal

parts.
Image

By 7pm the tail light bracket and the air filter are painted and the air filtter bolted down
Image

The service hatch doors dry and when they are dry enough I mount them on the truck to keep them safe. A small resand and final top coat need to fix a few little mistakes. Wow they look ace.
Image

9pm and I'm still clearing out parts and trying to clean up
Image

Taillights look ace also then I try to bolt them in. The RIVNUTS will not fit in the holes damn

I got the wrong size. I don't bother to try nd redrill the holes im too tired.
Image

Then I realise the issue. Oh no the rear panel some paint is lifting despite high pressure hosing and sanding the paint stripper has had revenge. Some of the doors need to be resanded and a few body filler marks fixed. The thunderstorm during painting has left huge amounts of water in the air tank some has come out on the doors also.

Packup the workshop and make a list. To fit the cabin all I need is the heat shield mounted

and the radiator outlet completed and the last bend of the air intake done.

10pm Home time - hook the trailer and boat up and its time for home for that long 190k drive home.

I stay awake all night prepare 1 car for a charity event for a kids home for a friend to drive and the ISUZU is prepared for the employee to collect and do running around to fix the 8 broken ATV's from our business, packing for HK. I finally fell asleep 5pm in the Hotel in Hong Kong on Sunday.

Progress sometimes is tiring lol.

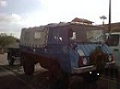
And that Volvo it's in really bad shape. I know the resort it used to run on taking tourists and saw it being abused.
Image

Right rear cross member ripped off etc.
Image
User avatar
VinceAtReal4x4s
Admin
United States of America
Posts: 2039
Joined: Mon Apr 12, 2004 10:36 pm
Location: Ca. or lost in South West USA
Contact:

Re: Intro from Malaysia - WR7002 - C304

Post by VinceAtReal4x4s »

Wow, nice find. The axles alone should be worth the trouble. I like that grill badge too.
"For those who risk, life has a flavor the protected shall never enjoy"

Your donation makes this site possible!

Image
User avatar
Andre
United States of America
Posts: 960
Joined: Fri May 12, 2006 10:41 pm
Location: Winnsboro Tx
Contact:

Re: Intro from Malaysia - WR7002 - C304

Post by Andre »

I don't think most folks understand. This isn't "break down and reassembly" your doing here. This is Break down and Build from scratch, design as you go, re engineer as needed to make a fully functional rig. That takes time, patience, knowledge, skill, and Rescorces. I would have been sleeping in a camper at the shop to keep progress moving any faster than you are doing right now. Bravo to your efforts and keep eating that elephant one bite at a time.
Fat Fabrications
2993 FM 1647
Winnsboro, TX. 75494
fatfabrications@yahoo.com
(903) 365-2332 shop
(951) 765-7224 mobile
Facebook.com/dokapinz6x6
Www.fatfabrications.com
geckoadventure
New Zealand
Posts: 481
Joined: Sat Aug 21, 2010 8:48 pm
Location: Malaysia
Contact:

Re: Intro from Malaysia - WR7002 - C304

Post by geckoadventure »

Someone asked in another forum what's the plan?

This is the idea so far:
- rugged shopping trolley to go to expensive malls and jockey park it beside the farking porches ferraris's and Bentley's if you think i'm joking i'm not lol.
- Toss the rear tray steel round tube tray with alloy tray and slightly chopped.
- Full restore of cabin covered in a comp spec rollcage - think Dakar truck - Rahmat from Rahmat playhouse garage is already crying after seeing the pics
- 2 winches probably 8274's
- fix missing section of right rear chassis
- rear mounted radiator and intercooler etc
- air suspension and if I can get past road transport a-frame suspension
- 2 sets of doors one with windows chopped off other full doors (handbag days out with wife).
- fit race harness seats and belts
- engine possibly 15B-T and Toyota auto gearbox
and that will be it one big fun offroad truck that I may use in comp to show because I CAN lol

Rollcage made in IPOH rest done in KL at a workshop (or rent half an engineering shop sill looking) by me and yet to be found
geckoadventure
New Zealand
Posts: 481
Joined: Sat Aug 21, 2010 8:48 pm
Location: Malaysia
Contact:

Re: Intro from Malaysia - WR7002 - C304

Post by geckoadventure »

Andre wrote:I don't think most folks understand. This isn't "break down and reassembly" your doing here. This is Break down and Build from scratch, design as you go, re engineer as needed to make a fully functional rig. That takes time, patience, knowledge, skill, and Rescorces. I would have been sleeping in a camper at the shop to keep progress moving any faster than you are doing right now. Bravo to your efforts and keep eating that elephant one bite at a time.
Thankyou Andre for your kind words unfortunately I don't have a camper van oh yeah i'm building it lol.

I gotta have it finished for 28th NOvember for RFC 2016 (Rain Forest CHallenge) as some of my overseas friends are coming they wanna see it completed.
geckoadventure
New Zealand
Posts: 481
Joined: Sat Aug 21, 2010 8:48 pm
Location: Malaysia
Contact:

Re: Intro from Malaysia - WR7002 - C304

Post by geckoadventure »

Cameron wrote:awesome that you've got another! what's the plans for the new one?
So this is the idea so far:
- rugged shopping trolley to go to expensive malls and jockey park it beside the farking porches ferraris's and Bentley's if you think i'm joking i'm not lol.
- Toss the rear tray steel round tube tray with alloy tray and slightly chopped.
- Full restore of cabin covered in a comp spec rollcage - think Dakar truck - Rahmat from Rahmat playhouse garage is already crying after seeing the pics
- 2 winches probably 8274's
- fix missing section of right rear chassis
- rear mounted radiator and intercooler etc
- air suspension and if I can get past road transport a-frame suspension
- 2 sets of doors one with windows chopped off other full doors (handbag days out with wife).
- fit race harness seats and belts
- engine possibly 15B-T and Toyota auto gearbox
and that will be it one big fun offroad truck that I may use in comp to show because I CAN lol

Rollcage made in IPOH rest done in KL at a workshop (or rent half an engineering shop sill looking) by me and yet to be found
Heinkeljb
Great Britain
Posts: 391
Joined: Wed Feb 27, 2013 1:09 pm
Location: Lewes,Southern England

Re: Intro from Malaysia - WR7002 - C304

Post by Heinkeljb »

we need some more pictures as it accelerates towards being finished! You are on the home stretch now - mostly paint and reassemble things by the looks of it. Do you remember where everything goes?

Well done that man on the mammoth build - Oh yes, take another bite at it every day you can!

John
geckoadventure
New Zealand
Posts: 481
Joined: Sat Aug 21, 2010 8:48 pm
Location: Malaysia
Contact:

Re: Intro from Malaysia - WR7002 - C304

Post by geckoadventure »

4 September 2016

Yes it's a Sunday, Saturday was spent taking the long narrow boat to the boat factory 2 hours north of the workshop where the Volvo is, so hence 4 hours north of Kuala Lumpur (370k away) and along with the new tank and gauge for the boat I'm getting renovated/rebuilt read for the 1-9 October trip.

Unfortunately I arrive at the boat factory 15 minutes after it closes thanks to a truck accident which blocked the highway tunnel off for 60 minutes means I gotta come back Monday morning.

So I gotta crap load of work to do remove the fuel tank there is a pile of diesel on the floor again. is time it's drastic action required.
Image

Tank is removed and washed out an dried ready for Mondays fixup.
Image

Then I find the reason for stuff (food ) disappearing from the back of the truck the errant puppy can climb and walk on beams.
Image

Then we weld up the exhaust heat shield and is a bust it neds to be remade sob as it WARPS after the tacking welds.
Image

Then it's onto the roof I have the remainder of the 5 holes to weld up grind weld up grind.

Eventually its done but the bends in the roof from its life as a police riot squad truck are left.
Image

Tank I'm ready to create a new bung Monday.
Image

5 September 2016 - Monday

Early morning - 7am to be exact I'm back on the road 2 hours or more up to the boat factory drop the boat off and deliver the new fuel tank and see the transformation of the restored boat

Then it's a long haul back to IPOH coming
Image

Big delay on the way back due to this rolled truck sigh another hour lost.
Image
Image

I cut the new bung out of 8mm alloy block and drill the hole and tap the thread and hand it over to be welded to the tank. When we shut the factory at 6pm it's tacked in.
geckoadventure
New Zealand
Posts: 481
Joined: Sat Aug 21, 2010 8:48 pm
Location: Malaysia
Contact:

Re: Intro from Malaysia - WR7002 - C304

Post by geckoadventure »

10 September 2016 - Sunday

Work is on the rear panel final sand and preparation. I spend most of the day working on this.
Image

The new bung is in the tank and I re-mount the tank and put 72 litres of diesel in it. Bravo 8 hours later it's not leaking. It's finally fixed. Only the tank cover to go.
Image


11 September 2006 - Monday

Image
geckoadventure
New Zealand
Posts: 481
Joined: Sat Aug 21, 2010 8:48 pm
Location: Malaysia
Contact:

Re: Intro from Malaysia - WR7002 - C304

Post by geckoadventure »

16 September 2006 - Friday public holiday

Sunday morning hit the roof with body filler all the tape is where body filler small amounts have to go.
Image

Image

By early evening I have the cabin top sanded and undercoated
Image

Image

17 September 2006

Finally it's painted then I see the mistake the leak in the paint can has leaked onto the valance sigh
Image

Rest of the day is spent preparing a RHD steering asseembly for a guy in Melbourne which I salvaged from a wrecked Volvo.

Now for the long break next weekend is collect the boat a prepare it and my camping for my 1-9 October holiday of camping and fishing.

See you all in a few weeks.
geckoadventure
New Zealand
Posts: 481
Joined: Sat Aug 21, 2010 8:48 pm
Location: Malaysia
Contact:

Re: Intro from Malaysia - WR7002 - C304

Post by geckoadventure »

29 October 2016

Extended Holiday over, workshop has reopened afer the owner was away for an operation, time to work on the Volvo. I have no idea what to do I make a list in the first hour.

1. Fit the intercooler and bolt it down
2. Fit the rear panel
3. Fit the rear tailight and bracket
4. Fit the fuel tank panel.
5. Flush the engine block

Oh no it's a public holiday nothing is open so cannot get anything from the part shops.

So first simple stuff

Fit the rear panel with finger tight stainless steel bolts
Image

Fit the bottom rear taillights and bracket with RIVUTS
Image

Pop the fuel tank cover onto a stand and put it in place
Image

By evening with a few mods I have it ready to bolt in
Image

And finally it's finished bolted in
Image
Post Reply