Page 3 of 7
Posted: Thu Mar 19, 2009 8:52 pm
by milesdzyn
Thanks guys, just got the hard top from a 710K today. (Thanks to Dennis @ Linden Engineering) I was going to run a hard top over the rear with the front cab remaining a soft top. But who knows, it could change to a SUT layout as well. Still trying to figure it out.
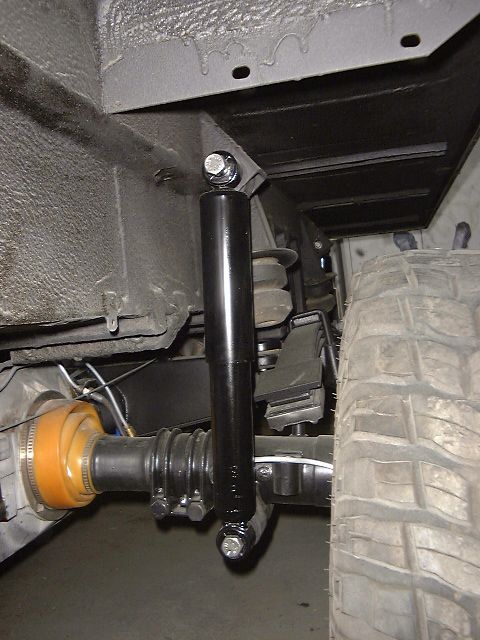
Erik712m....Just barely, I rolled the bed liner a little thinner at the cover just because of that. I also used a soft 1/4" neoprene gasket to seal the cover on it's edges.
Miles
Posted: Thu Mar 19, 2009 9:35 pm
by Erik712m
Miles, you might see if Scott has the back off their last DK build. I was able to take the two 710k tops to make one big enough to fit the 712 and still looks factory.
Posted: Tue Mar 24, 2009 10:51 pm
by milesdzyn
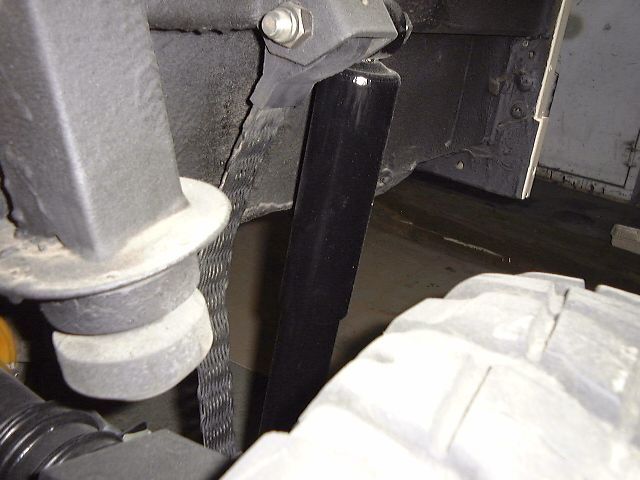
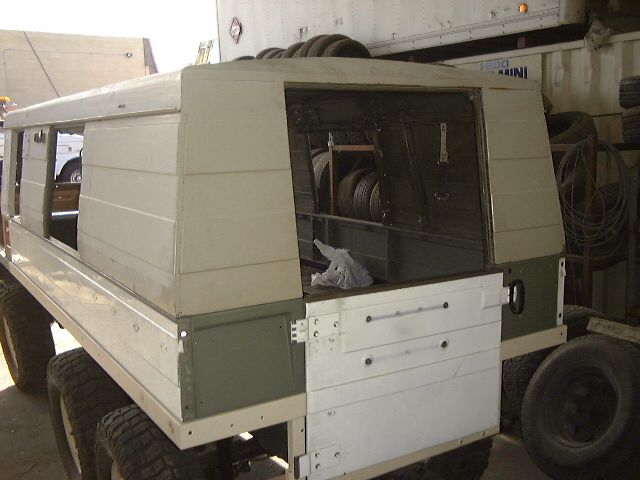
Got the hard top test mounted and some of the cutting roughed out. All the mount holes were drilled into the side rails and I'm happy with the fit so far. It needs some body work done and final cutting at the front roll bar. I will weld the front roll bar into the top and add some panels to the side openings creating a one piece top structure.
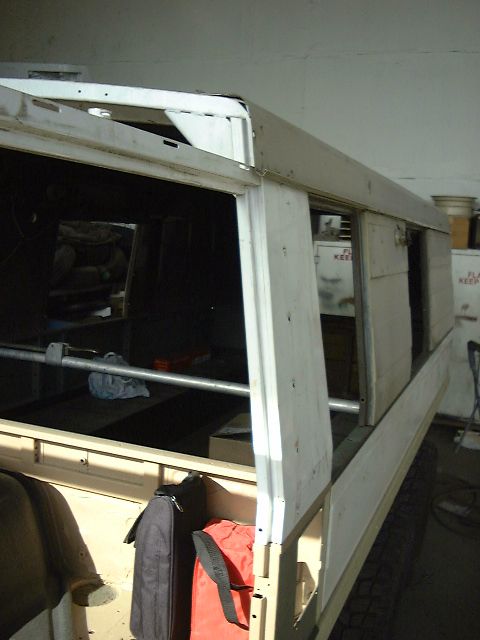
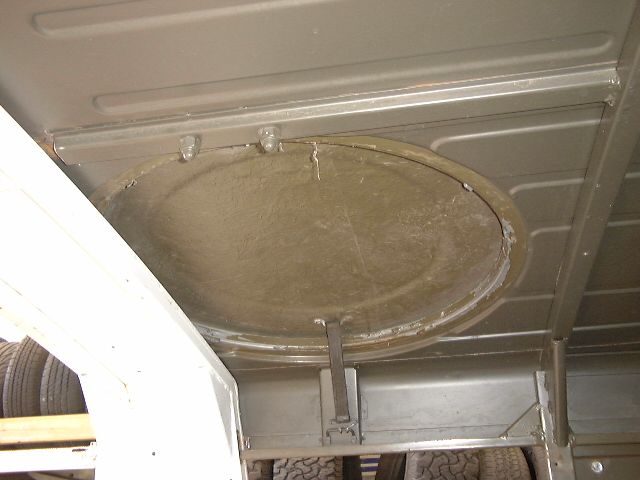
As for the top port hatch It will still be usable without cutting the front roll bar, thou I will lose about 3" of access, good thing I've lost some weight.
 More pictures @ PinzDepot Body Work Album page
Also replaced all the 6mm rub rail nutserts with 10mm nutserts for extra strength, well worth the effort.
Miles
Posted: Tue Mar 24, 2009 11:24 pm
by chacaocop1
Awesome!
What are you planning to do with the sections that used to accomodate the doors?
Carlos.
Posted: Wed Mar 25, 2009 1:21 am
by EvanH
Miles,
Your Pinz is more colorful than a George Carlin monologue.
Funny thing - I was at Dennis's shop while the top was being crated. I scavenged about $1k in parts from the same carcass.
In the interest of political correctness, "Linden" is the name of the shop - a blend of "Dennis" and "Linda" his wife's name. Their last name is Williams.
-Evan
Posted: Wed Mar 25, 2009 8:26 pm
by milesdzyn
Carlos...For now I will just weld in some sheet metal into the window sections, I will only have visual access through the rear door upper section and a portal between the cab and rear. Things may be added at a later date.
Evan... You have no idea how distracting it is not having a solid color, but untill I get all the metal work done my hands are tied. I swear I do have a plan going for the colors, sort-of.

For now I will work on the interior cab parts, since our Mig Welder is on the fritz.
Miles
Posted: Sun Mar 29, 2009 6:35 am
by norcal pinz
Posted: Sun Mar 29, 2009 2:53 pm
by milesdzyn
Posted: Sun Mar 29, 2009 3:16 pm
by EvanH
Miles,
You must have one big honkin' pile of sand from all of the sandblasting.
Yesterday I drilled, sandblasted, primed and painted one wheel as an intro to my Staun beadlock photo-essay. I used gloss black, and I think it looks the best.
My color scheme will be everything below the rub rail black, and everything above desert tan. My target touring area is the deep desert.
-Evan
Posted: Thu Apr 23, 2009 10:03 am
by EvanH
Miles,
What is your tool of choice for removing paint from wide swaths of sheet metal?
I have the body detached from the frame, and I'm going to start cleaning up the body soon.
Thanks!
-Evan
Posted: Thu Apr 23, 2009 10:53 pm
by milesdzyn
For the body - Paint stripper and a wide scrapper, followed by a orbital sander with heavy grit 60 sandpaper. I was fortunate in that my body had very little rust, just a few small spots of surface rust.
For the frame members - Angle grinder with paint stripper discs.
Miles
Posted: Mon Apr 27, 2009 11:58 pm
by milesdzyn
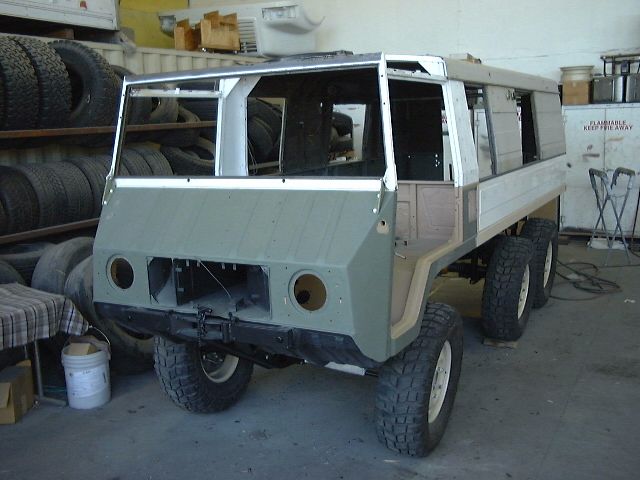
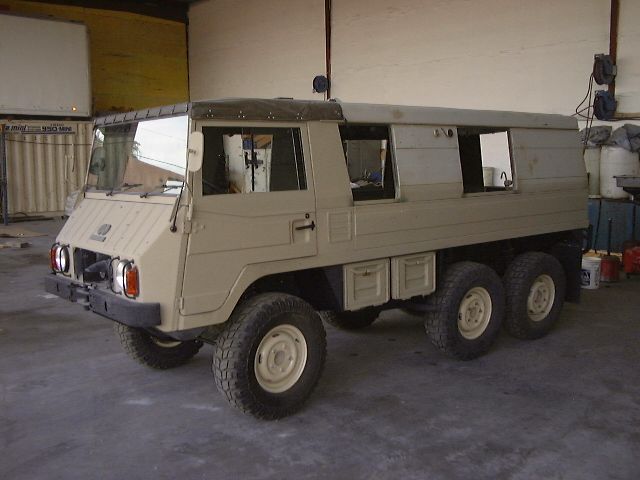
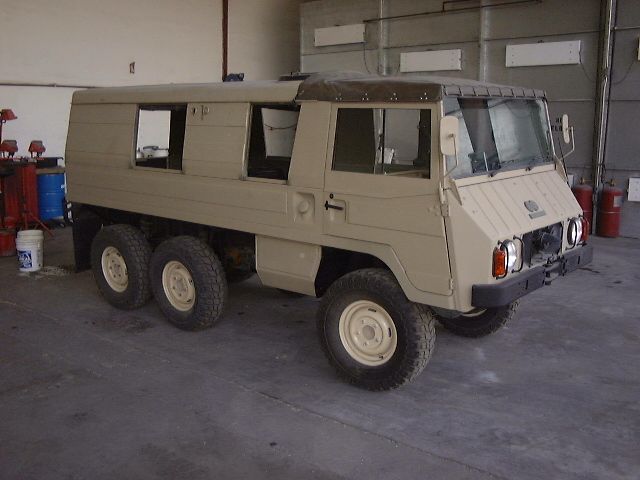
Due to the sale of the company I worked for, my priorities have changed, to getting the pinz up and running. The body work will have to be done later as time allows. Here is some pics of the progress to date.
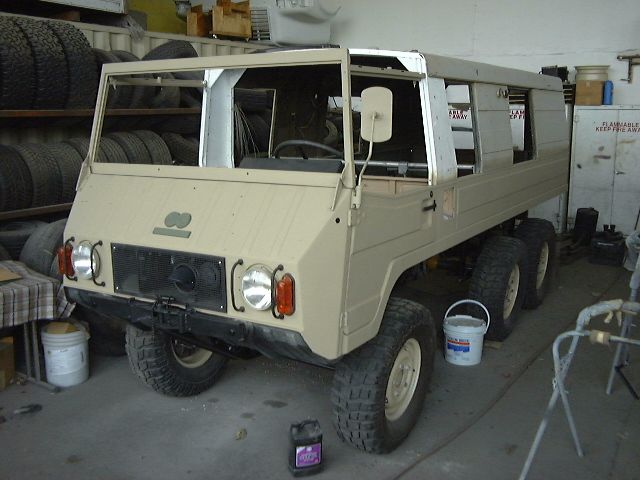
Painting will continue for the lower body and the electrical finished within the week.
Miles
Posted: Sun Jun 14, 2009 12:18 am
by milesdzyn
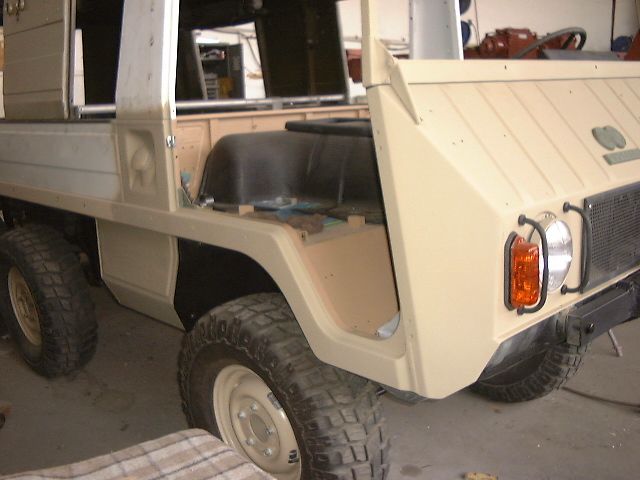
Just a quick update as to the body work progress. Mostly done exept for the sheet metal for the hard top.
I've run into a dead cylinder (#2) that's got me a little puzzled. I'm waiting to get my carb bases fixed before I get into it any further.
I'm hitting the back stretch

Miles
Posted: Mon Jun 15, 2009 5:36 pm
by Middlebury_Pinz
Miles,
It's looking great!! What will you do with the holes to the old doors? Can't wait to see more pictures. Keep them coming when you get time!!
Mike
Posted: Mon Jun 15, 2009 5:54 pm
by ka
cut in doorways and doors!