Page 6 of 7
Re: Miles Pinz Restoration Progress (pic heavy-milestone thr
Posted: Tue Apr 12, 2011 10:58 pm
by cruzoropeza
Extreeeeeemely impressive. I really want to do something like...... One day...... congrats!!!!!!
Re: Miles Pinz Restoration Progress (pic heavy-milestone thr
Posted: Wed Apr 13, 2011 11:47 am
by totaljoint
Miles:
I like your aluminum medical boxes, very useful and tough.
If you mount them vertically like that and want some drawer storage space too, there is an insert made to fit those chests:
http://www.sportsmansguide.com/net/cb/n ... x?a=561520

Ed
Re: Miles Pinz Restoration Progress (pic heavy-milestone thr
Posted: Wed Jun 15, 2011 6:39 am
by audiocontr
Those storage lockers are a great idea. Would you be interested in selling two?
Re: Miles Pinz Restoration Progress (pic heavy-milestone thr
Posted: Thu Jun 16, 2011 12:06 pm
by milesdzyn
Sorry I don't have any extras left, they are really easy to make and you should be able to find some locally to modify.
Miles
Re: Miles Pinz Restoration Progress (pic heavy-milestone thr
Posted: Thu Jun 16, 2011 5:58 pm
by norcal pinz
Re: Miles Pinz Restoration Progress (pic heavy-milestone thr
Posted: Mon Jan 21, 2013 4:58 pm
by milesdzyn
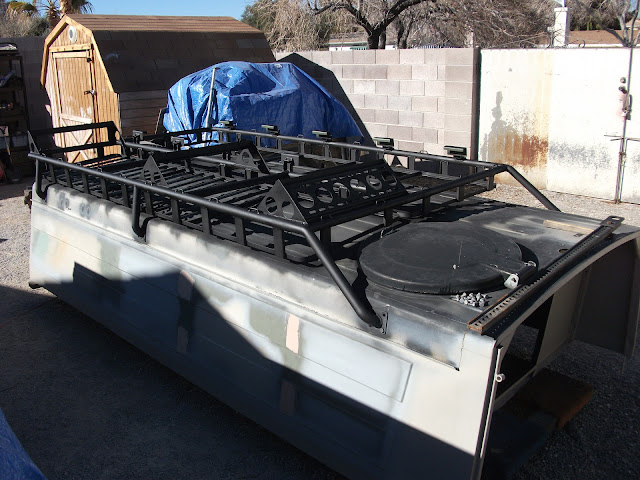
Okay so it's been quite a while since I've updated this thread, Since the last update I've Added structure to the interior of the hard top and insulated it. I have also completed the Roof Rack except for paint.
Just the bare metal structure.
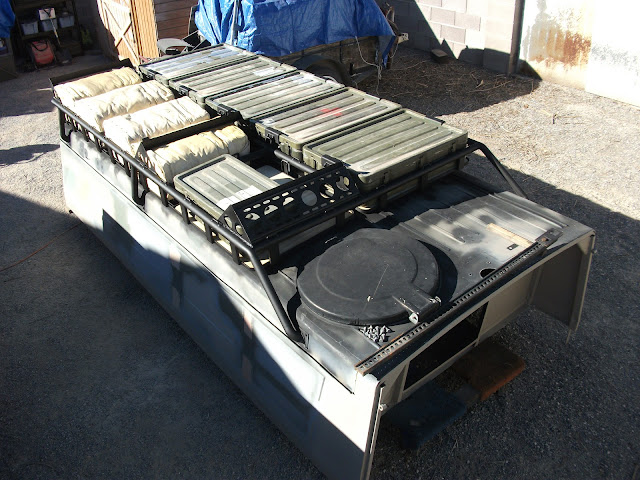
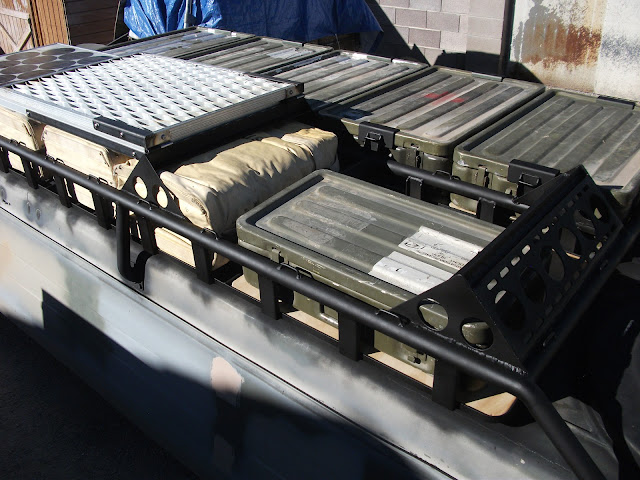
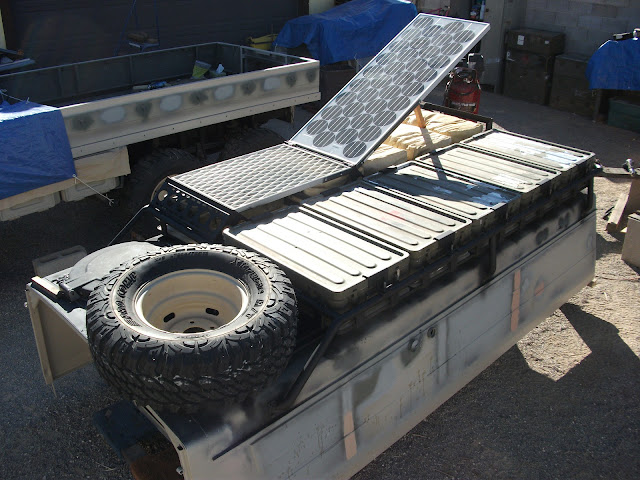
How things fit in, 4 insulated 5 gallon water cans + 5 aluminum containers + storage for odds and ends.
The aluminum grate secures the small storage area while providing a standing platform and the solar panel secures the water cans.
A bare tire without a rim will secure to the roof with straps and the solar panel will have tilt for best solar collecting in winter months.
Next up is a added front bumper guard to mount my driving lights, till then if the weather holds I need to paint the roof and roof rack.
Miles
Re: Miles Pinz Restoration Progress (pic heavy-milestone thr
Posted: Mon Jan 21, 2013 5:18 pm
by pcolette
Very nice! Really great looking rack - I like your functional design. Can't wait to see it finished.

Re: Miles Pinz Restoration Progress (pic heavy-milestone thr
Posted: Mon Jan 21, 2013 7:08 pm
by 4x4Pinz
you the man if you can get a loaded medical box off the roof. I can barely lift mine into the back of my pinz.

Re: Miles Pinz Restoration Progress (pic heavy-milestone thr
Posted: Sat Feb 16, 2013 7:17 pm
by milesdzyn
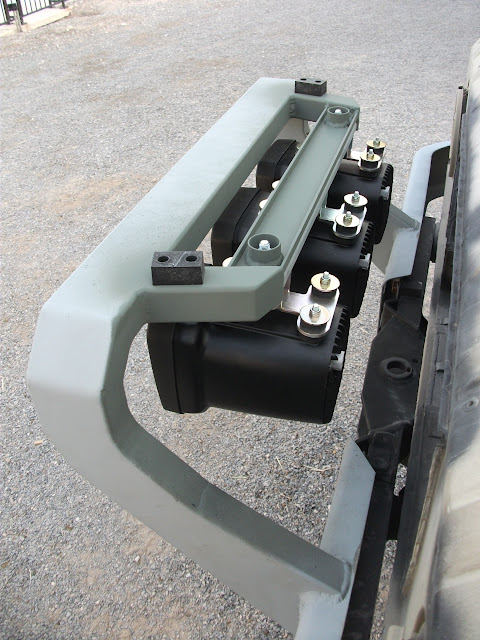
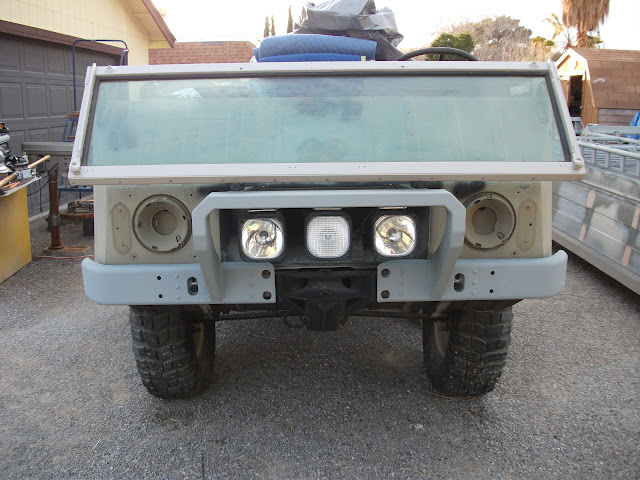
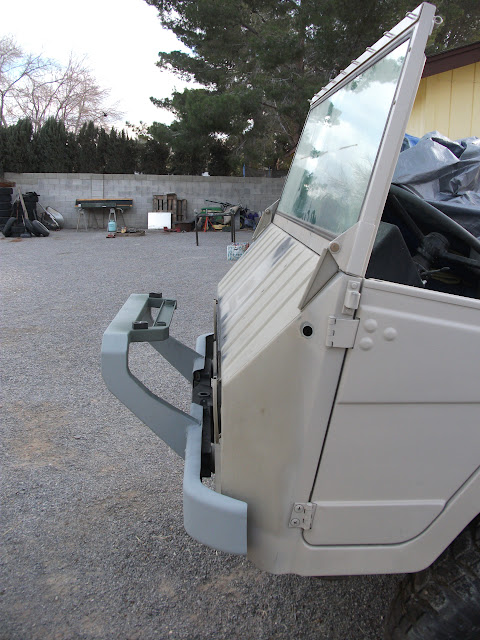
I got the bumper fabrication finished but still need to add paint, used 3"x 1.5" rectangular tubing with a notch and bend construction.
The bumper with the lights mounted.
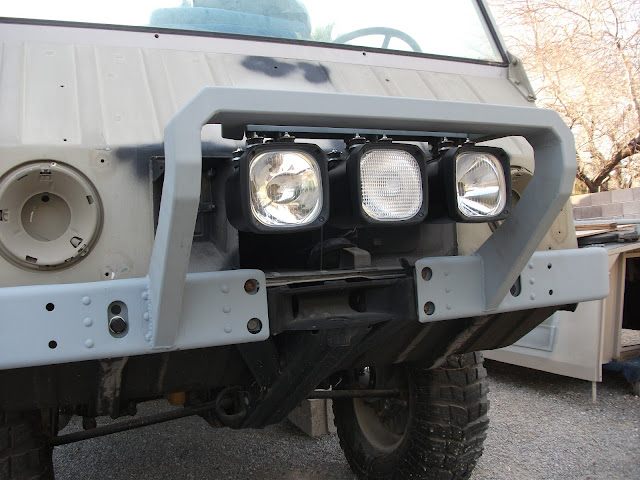
The whole light array can be removed by removing 2 wheel lock nuts and unplugging the wiring.
Showing the windshield down.
Easier to see the construction without the lights installed.
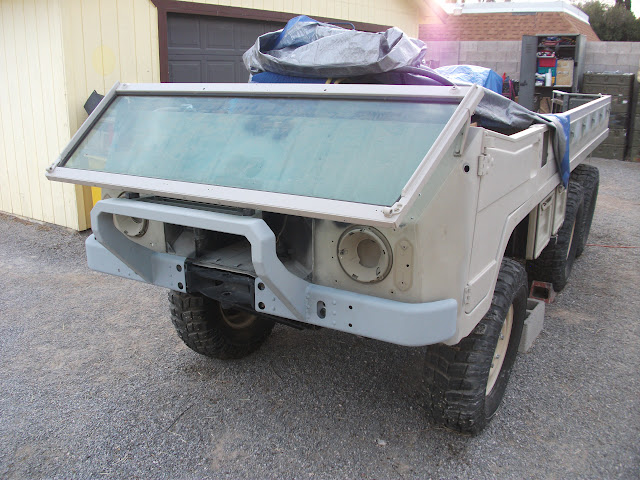
The lights are the ones CAT uses on their heavy equipment. They are 24V 35watt H.I.D. lights with all of the electronics potted into the back side of the cast aluminum housings, so they are vibration and water proof. I have a full set of 3 each of High Beam, Wide Work and Amber Fog Lenses and they are replaceable with 4 screws for easy on the trail swaps for what ever conditions I may run into.
Getting started on another jerry can holder for the rear door, will post them when finished.
Miles
Re: Miles Pinz Restoration Progress (pic heavy-milestone thr
Posted: Sat Feb 16, 2013 10:38 pm
by mopar
Nice I like it.
Re: Miles Pinz Restoration Progress (pic heavy-milestone thr
Posted: Sat Feb 16, 2013 10:47 pm
by totaljoint
Great design. It compliments the angles of the front end of the Pinz. Looks like an integral component rather than an add on!
Re: Miles Pinz Restoration Progress (pic heavy-milestone thr
Posted: Sat Feb 16, 2013 11:21 pm
by krick3tt
Good work. Is the flimsy pinz bumper capable of supporting that add on piece?
Re: Miles Pinz Restoration Progress (pic heavy-milestone thr
Posted: Sun Feb 17, 2013 12:09 pm
by milesdzyn
The added bumper nose is welded between the mounting bolts so it is very solid, enough for me to stand on it with no problems, while leaving the ends of the bumper to be weak enough to bend without bending the other parts of the frame and body. Let the bumper do what it was designed to do, when you put too strong of a bumper in place all the energy of a light bump gets transferred into the frame causing damage with every light bump.
I'm happy with the design and will be making a set of bumpers for the rear from the same 3" x 1.5" tubing stock; I never liked the look of the round tube bumpers on the rear.
Miles
Re: Miles Pinz Restoration Progress (pic heavy-milestone thr
Posted: Sun Feb 17, 2013 12:36 pm
by krick3tt
Thanks for the response. I have a very strong bumper in the front. Had not been thinking along your lines of thought about transfer. I thought...stronger is better.
I will be anxious awaiting photos of your rear assembly as I am also not particularly enamored with those little tubes either. I did not want anything that interferes with the
tow pintle.
Morris
Re: Miles Pinz Restoration Progress (pic heavy-milestone thr
Posted: Mon Feb 18, 2013 12:42 pm
by McCall Pinz
milesdzyn wrote:I never liked the look of the round tube bumpers on the rear.
I agree 100%. They look completely unrelated to the rest of the truck and like a last minute add-on. I'm working on a front and rear bumper design combo.