
Why is the door sticky, sand. Why won't the rear door open, sand. What is all that crap all over everything, sand.
At least now that the paint is dry I can park it while it's raining and not worry about it. So now I'm in the cleaning stage, washing out the interior and the back compartment. The rear door wouldn't unlatch, not sure yet what's wrong with the mechanism. I had to unbolt the hinges and to take the door off, but that will give me a chance to paint the area's that I wasn't able to get to before.
I should have just taken it off first thing, live and learn. Upon closer inspection the paint job will work fine for the winter and I will repaint again this spring / summer when it's dry and warmer to get another coat on.

What is all that? Sand.
You can see the line between the old paint and the new, plus on the upper right corner is an example of where I did not get a good even coat. I'll touch that up soon.

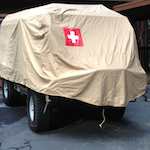
Looks good with the top on. Next up is replacing the windshield rubber (I'm watching the other post, but think I'll end up just having custom rubber put in by a local guy who's great with glass) and weather stripping around the upper storage box You may notice it's not level in the front, I pulled the old rotten weather stripping out so it's laying on bare metal and rests a little low without the rubber.
The engine is running pretty rough on the loaner carbs (from the shop). I was able to trade for some parts so now I've got 10 Stromberg carburetors, I'll take those in soon and get two good ones installed.
I've also got the headlight brackets and the tail light brackets being powder coated and once those go back on I'll be street legal!