Page 2 of 2
Posted: Sun Mar 25, 2007 6:53 am
by PinzEOD
I've never cared too much for the spray copper stuff in the past, but if Jim L recommends it, that's the way I'm going. My paper gasket experience is pretty much limited to thermostat housings on 'regular' motors.
Posted: Sun Mar 25, 2007 6:49 pm
by todds112
Here's the othet thread where it's mentioned:
viewtopic.php?t=2571
Posted: Sun Mar 25, 2007 8:00 pm
by mjnims
On paper gaskets and locations where no gaskets are used I have had exceptional luck with the Permatex aviation form-a-gasket. Like Jim said use it sparingly, the stuff goes farther than you think. Also works well to hold the valve cover and oil pan gaskets in place.
Posted: Tue Mar 27, 2007 7:00 pm
by PinzEOD
I did some disassembly, cleaning and reassembly today.
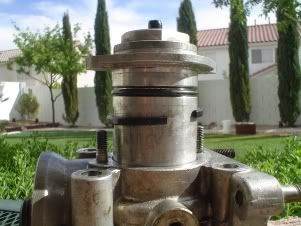
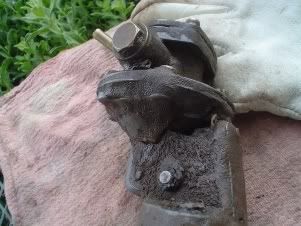
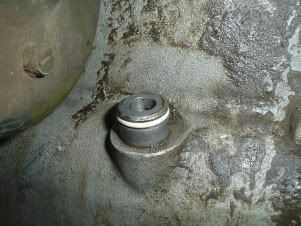
I really think this o-ring at the thermostat was the cause of the seepage around the oil cooler area. The old o-ring was hard and simply broke apart when I removed it. I've wrapped the old ring around the thermostat below the new ring for comparison. You can see how flat it has become in the seal area. If you ever have yours apart, be aware of the thermostat "port' alignment. It needs to fit back in the same way it slipped out.
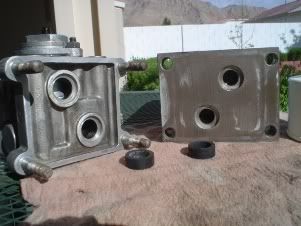
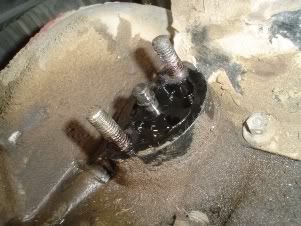
Here I've cleaned and prepped the contact surfaces. A rag soaked with brake cleaner to wipe it down, then a bit of the aforementioned aircraft sealant.
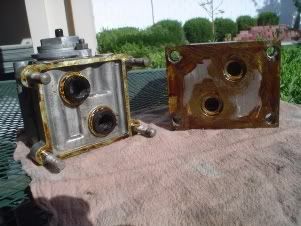
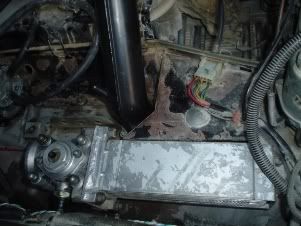
Here the fins are attached to the oil filter casing, the nuts are just finger tight. You can see the space created by the new seal rings. Tightening the nuts will squeeze the seals to a (hopefully) leak free passage.
I'll post a few more pics when I get the fuel pump kit.
Posted: Tue Mar 27, 2007 10:27 pm
by Kiwibru
Beautiful work! Posting the photos really helps the understanding, thanks!
Posted: Wed Mar 28, 2007 12:10 am
by todds112
Great pics, thanks. I'll be sure to check that too while I have everything out.
Posted: Sat Mar 31, 2007 8:22 pm
by PinzEOD
A few more pics...
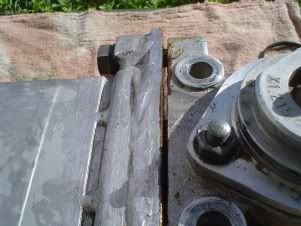
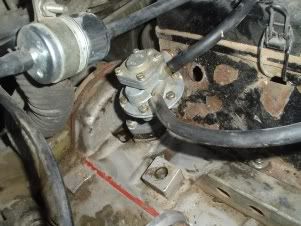
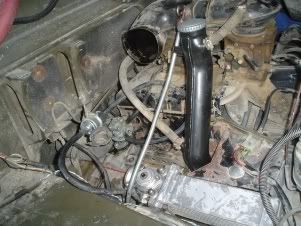
Fuel pump was very dirty, I suspect it was weeping a bit at the relief hole. The spacer block was on solid so I opted to leave it alone and clean the top good for the new gasket.
Reinstalled the oil filler tube, cooler assembly, then the fuel pump. Be mindful of the little spacer doodad at the forward end of the cooler (book calls it a distance piece).
Installed a new o-ring for the dipstick tube. There's a cover in the wheel well that comes off for easy access. All set for a test firing.
Overall a pretty straight forward project. I used some brake cleaner spray for cleaning a bit as I went along. That Spray N Wash idea is EXCELLENT!!! I used it for some final cleaning. Took a lot of cranking and a bit of manual priming to the carbs to get it fired up. Readjusted the carbs too. I have fuel pump disassembly pics. I can put them in another thread if they'd be useful.
Posted: Sat Mar 31, 2007 8:45 pm
by todds112
Awesome! Your pic of the fuel pump just removed is what my block looks like. Now I'm wondering if it's the spacer to engine or spacer to pump gasket that's leaking. Also in the service manual it says you adjust the throw of the pump rod by adding/substracting gaskets from between the spacer and the pump. I can't see that it would make that much difference in either case.
Please post up pics of the fuel pump R&R.